

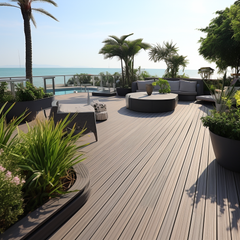


Product Data Sheet
Product Name |
WPC Decking |
Material | Wood Plastic Composite |
Type | 3D Embossing Decking |
Technics | Embossed, Fine grooves |
Colors |
Antique, Light Gray, Silver Gray, Teak, Redwood or Customized |
Size | 137mm*22.5mm or Customized |
Surface Treatment |
Flat, Brushed, Wood Grain, Sanded, Deeper Grains or Customized |
Function | Waterproof, Fire Retardant, Rotproof, Slip Resistant, UV Resistant, Insect |
Application | Garden, Lawn, Balcony, Hallway, Garage, Swimming Pool, Boardwalk, etc. |
Design and colors
About Us
Empowering DIY Enthusiasts: Insights and Tips for Installing WPC Decking
Embarking on a do-it-yourself (DIY) project to install Wood-Plastic Composite (WPC) Decking is a rewarding endeavor that combines creativity and practicality. In this article, we share valuable insights, techniques, and essential precautions gained from DIY experiences, aiming to empower enthusiasts with the confidence to create their dream outdoor space.
Thorough Planning: Before diving into the installation process, meticulous planning is crucial. Measure the area accurately, consider the layout, and account for any unique features or challenges. A well-thought-out plan sets the foundation for a smooth DIY installation.
Selecting the Right Tools: Having the appropriate tools on hand simplifies the installation process. Essential tools may include a saw, drill, level, tape measure, and safety equipment. Ensuring all tools are in good working condition enhances efficiency and safety.
Understanding Substructure Requirements: The success of WPC Decking installation lies in a sturdy substructure. Understand the manufacturer's guidelines for joist spacing, material specifications, and proper support. A solid substructure contributes to the long-term stability of the deck.
Choosing the Right Fasteners: Opt for stainless steel screws designed for outdoor use. These fasteners resist corrosion and enhance the overall durability of the deck. Follow the recommended guidelines for screw placement and ensure they penetrate the pre-drilled holes.
Deck Board Orientation: WPC Decking often features grooves on one side and a smooth surface on the other. Consider the orientation based on preferences for aesthetics and anti-slip properties. Experiment with different orientations before securing the boards in place.
Leaving Adequate Gaps: Account for thermal expansion by leaving small gaps between decking boards. This precaution prevents potential warping or buckling as the material reacts to temperature fluctuations. Refer to the manufacturer's recommendations for gap spacing.
Consideration for Edges and Trim: Pay special attention to the edges and trim of the deck. Ensure a clean and polished finish by trimming boards accurately. Consider using fascia boards for a professional and aesthetically pleasing edge.
Weather Considerations: Choose a suitable time for installation, factoring in weather conditions. Mild and dry weather is ideal for a DIY project. Avoid installing WPC Decking during extreme temperatures or inclement weather, as it may impact the material's performance.
DIY Safety Precautions: Prioritize safety throughout the installation process. Wear appropriate protective gear, follow tool safety guidelines, and take breaks when needed. An injury-free DIY experience contributes to the overall satisfaction of the project.
Post-Installation Inspection: Once the installation is complete, conduct a thorough inspection. Check for any loose screws, uneven boards, or potential hazards. Address any issues promptly to ensure the longevity and safety of the WPC Decking.
By embracing a DIY approach to WPC Decking installation and incorporating these insights, enthusiasts can create a personalized outdoor space that reflects their vision and enhances the beauty of their home. The combination of planning, attention to detail, and safety considerations ensures a successful and fulfilling DIY experience.
Thanks for subscribing!
This email has been registered!